
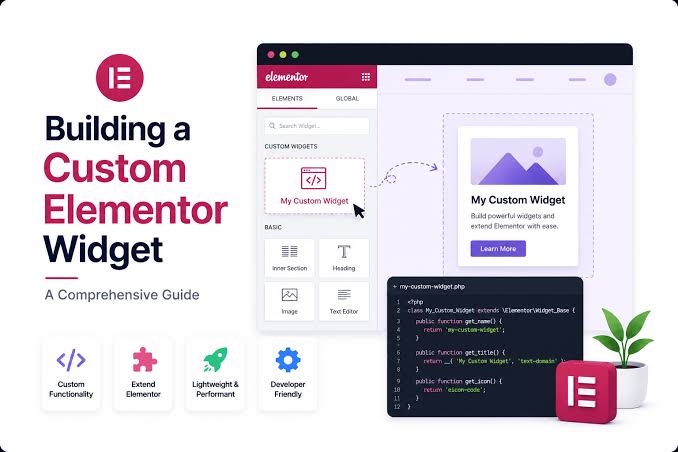
Building Custom Elementor Widgets from Scratch: Packaging Complex HTML/JS Components with PHP Widget_Base

An advanced object-oriented PHP masterclass on building custom Elementor widgets from scratch by extending Widget_Base, registering controls, and rendering dynamic frontend markup.

Building Custom Elementor Widgets from Scratch: Packaging Complex HTML/JS Components with PHP Widget_Base
Object-oriented widget development: Extending \Elementor\Widget_Base in PHP.

Table of Contents

Elementor provides over a hundred built-in widgets covering buttons, headings, image galleries, forms, and carousels. However, when developing bespoke enterprise websites or converting complex interactive HTML components (such as interactive pricing comparison toggles, 3D product cards, or animated ROI calculators), relying solely on standard core widgets forces developers into awkward workarounds and bloated custom CSS.

The professional, object-oriented solution is developing a Custom Elementor Widget packaged within a lightweight custom plugin. By extending Elementor's internal ElementorWidget_Base abstract class, developers can create native, branded widgets that appear directly in the Elementor editor sidebar, complete with custom text fields, color pickers, repeater lists, and real-time live preview rendering. In this engineering guide, we dissect the complete architecture of custom Elementor widget creation.

The Object-Oriented Architecture: Anatomy of Widget_Base

Every custom widget in Elementor is a PHP class that extends ElementorWidget_Base. The class must implement several fundamental abstract methods:

  • get_name(): Returns a unique programmatic identifier string (e.g., ce_pricing_card).
  • get_title(): The human-readable label displayed in the Elementor widget panel.
  • get_icon(): FontAwesome or eicons class for the widget panel icon.
  • get_categories(): Specifies which widget category tab it belongs to (e.g., general or a custom brand category).
  • register_controls(): Registers user-editable fields in the editor sidebar (Content, Style, and Advanced tabs).
  • render(): The server-side PHP method that renders the final HTML markup on the frontend.
  • content_template(): The client-side JavaScript (Underscore.js) method that handles live, instant rendering inside the visual editor without page refreshes.
Building Custom Elementor Widgets from Scratch: Packaging Complex HTML/JS Components with PHP Widget_Base
Registering custom controls, repeater lists, and conditional frontend asset enqueueing.

Step-by-Step Code Walkthrough: Building an Interactive Feature Card Widget

Let us write the complete, production-ready PHP class for a high-converting Feature Card widget:

<?php namespace ConvertElementor\Widgets; use Elementor\Widget_Base; use Elementor\Controls_Manager; if (!defined('ABSPATH')) exit; // Security guard class CE_Feature_Card_Widget extends Widget_Base { public function get_name() { return 'ce_feature_card'; } public function get_title() { return esc_html__('CE Feature Card', 'convertelementor'); } public function get_icon() { return 'eicon-info-box'; } public function get_categories() { return ['general']; } protected function register_controls() { // CONTENT TAB: Card Details $this->start_controls_section( 'section_content', [ 'label' => esc_html__('Card Content', 'convertelementor'), 'tab' => Controls_Manager::TAB_CONTENT, ] ); $this->add_control( 'card_title', [ 'label' => esc_html__('Title', 'convertelementor'), 'type' => Controls_Manager::TEXT, 'default' => esc_html__('Enterprise Security', 'convertelementor'), 'placeholder' => esc_html__('Enter title...', 'convertelementor'), ] ); $this->add_control( 'card_description', [ 'label' => esc_html__('Description', 'convertelementor'), 'type' => Controls_Manager::TEXTAREA, 'default' => esc_html__('Zero-trust authentication and bank-grade data encryption.', 'convertelementor'), ] ); $this->add_control( 'card_button_text', [ 'label' => esc_html__('Button Label', 'convertelementor'), 'type' => Controls_Manager::TEXT, 'default' => esc_html__('Learn More', 'convertelementor'), ] ); $this->add_control( 'card_button_url', [ 'label' => esc_html__('Button Link', 'convertelementor'), 'type' => Controls_Manager::URL, 'placeholder' => 'https://yourlink.com', 'default' => ['url' => '#'], ] ); $this->end_controls_section(); // STYLE TAB: Custom Styling Controls $this->start_controls_section( 'section_style', [ 'label' => esc_html__('Design & Colors', 'convertelementor'), 'tab' => Controls_Manager::TAB_STYLE, ] ); $this->add_control( 'title_color', [ 'label' => esc_html__('Title Color', 'convertelementor'), 'type' => Controls_Manager::COLOR, 'selectors' => [ '{{WRAPPER}} .ce-card-title' => 'color: {{VALUE}};', ], ] ); $this->end_controls_section(); } protected function render() { $settings = $this->get_settings_for_display(); $button_url = !empty($settings['card_button_url']['url']) ? $settings['card_button_url']['url'] : '#'; $target = $settings['card_button_url']['is_external'] ? ' target="_blank"' : ''; $nofollow = $settings['card_button_url']['nofollow'] ? ' rel="nofollow"' : ''; ?> <div class="ce-custom-feature-card"> <h3 class="ce-card-title"><?php echo esc_html($settings['card_title']); ?></h3> <p class="ce-card-desc"><?php echo esc_html($settings['card_description']); ?></p> <a href="<?php echo esc_url($button_url); ?>" class="ce-card-btn"<?php echo $target . $nofollow; ?>> <?php echo esc_html($settings['card_button_text']); ?> </a> </div> <?php } }

Registering the Custom Widget with Elementor's Plugin Manager

Creating the widget class is not enough; WordPress must register it with Elementor's runtime engine. In your main plugin file, hook into elementor/widgets/register:

add_action('elementor/widgets/register', function($widgets_manager) { require_once __DIR__ . '/widgets/class-ce-feature-card-widget.php'; $widgets_manager->register(new \ConvertElementor\Widgets\CE_Feature_Card_Widget()); });

Asset Optimization: Conditional Script and Style Loading

A fatal performance mistake in custom widget development is loading the widget's CSS and JS files on every single page of the website, regardless of whether the widget is actually in use.

Elementor provides an elegant architectural solution: the get_style_depends() and get_script_depends() methods. By registering your assets in wp_enqueue_scripts and listing their handles inside your widget class, Elementor will only inject the stylesheet and script when that specific widget is rendered on the active page:

public function get_style_depends() { return ['ce-feature-card-style']; } public function get_script_depends() { return ['ce-feature-card-script']; }

Conclusion: Enterprise Modularity

Building custom Elementor widgets bridges the gap between raw, bespoke frontend engineering and intuitive visual client management. By packaging your custom HTML and interactive JavaScript components inside object-oriented Widget_Base classes, you deliver a clean, enterprise-grade development experience that keeps page load times fast, styles encapsulated, and clients completely empowered.

Frequently Asked Questions (FAQ)

Can I build custom Elementor widgets with the free version of Elementor?

Yes. The entire Widget_Base development API and control registration system is fully accessible in the open-source, free core version of Elementor. Elementor Pro is not required to build custom widgets.

What is the difference between render() and content_template()?

render() executes in PHP to generate the final HTML on the live website. content_template() executes in client-side JavaScript (using Underscore.js templating) to provide instant visual updates inside the Elementor editor without triggering server requests.

How do I add a Repeater field to my custom widget?

You use $this->add_control( 'my_repeater', [ 'type' => Controls_Manager::REPEATER, 'fields' => $repeater->get_controls() ] ), which allows users to add unlimited dynamic items (such as pricing tier features or team members).

Advanced Control Engineering: Adding Dynamic Repeater Controls

When converting dynamic HTML components like pricing comparison tables, team grids, or FAQ accordions, your widget must allow content editors to add, remove, and reorder an arbitrary number of sub-items.

Elementor provides the Repeater Control for this exact requirement:

$repeater = new \Elementor\Repeater(); $repeater->add_control( 'feature_text', [ 'label' => esc_html__('Feature Item', 'convertelementor'), 'type' => Controls_Manager::TEXT, 'default' => esc_html__('Unlimited Cloud Storage', 'convertelementor'), ] ); $repeater->add_control( 'is_included', [ 'label' => esc_html__('Included in Plan', 'convertelementor'), 'type' => Controls_Manager::SWITCHER, 'label_on' => esc_html__('Yes', 'convertelementor'), 'label_off' => esc_html__('No', 'convertelementor'), 'return_value' => 'yes', 'default' => 'yes', ] ); $this->add_control( 'features_list', [ 'label' => esc_html__('Pricing Features', 'convertelementor'), 'type' => Controls_Manager::REPEATER, 'fields' => $repeater->get_controls(), 'title_field' => '{{{ feature_text }}}', ] );

In your render() function, you simply loop through $settings['features_list'] and render your custom HTML tags, giving non-technical clients complete freedom to add or reorder items inside the Elementor visual canvas.


Looking for more WordPress & Elementor tutorials?

Explore our complete directory of 53+ web performance, theme development, and Elementor architecture guides.

View Topic Sitemap XML Feed